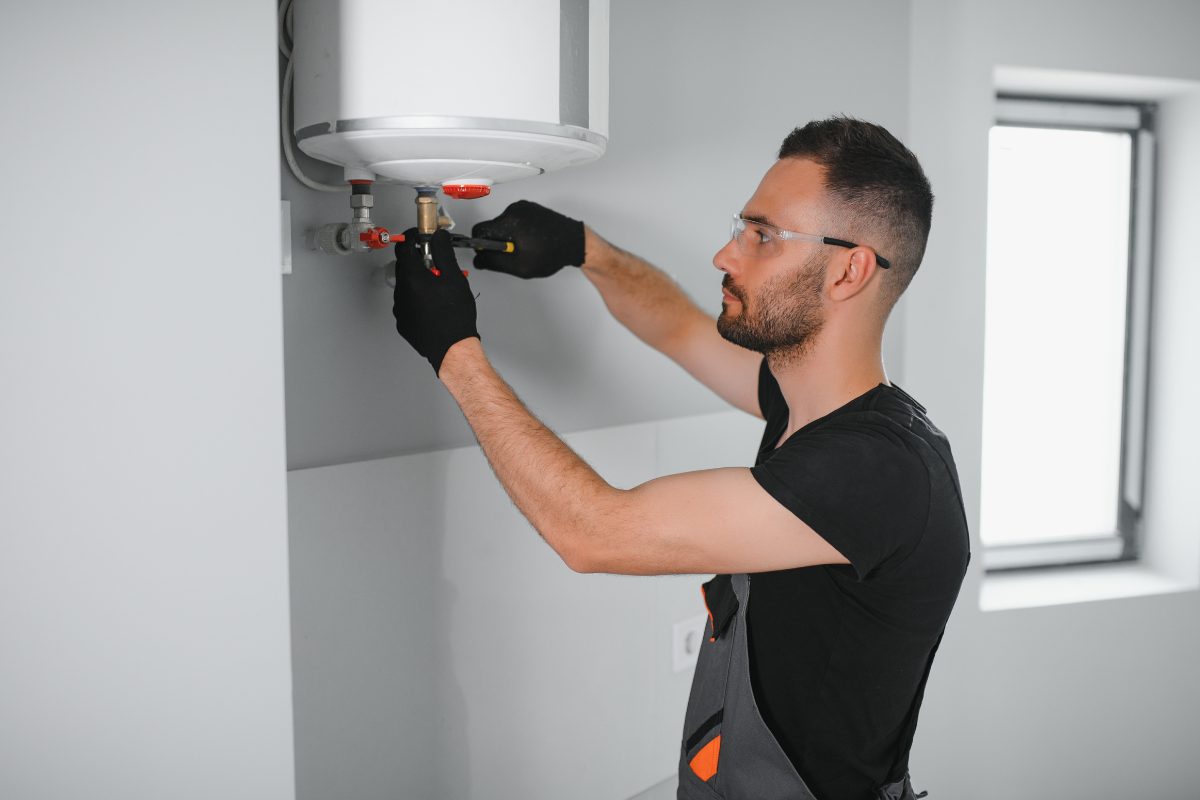
When a heating system ages out, attention gravitates to the new equipment: brand, efficiency ratings, rebates, and that satisfying quiet hum on a cold morning. What gets overlooked, and too often undermines the investment, is the ductwork. Ducts are the bloodstream of a forced-air system. If they’re undersized, leaky, or grimy, the newest heating unit will stumble, run long cycles, and deliver uneven comfort. I’ve walked into too many homes where a shiny furnace was paired with tired, constricted ducts. The owners spent real money and still wore sweaters in the back bedrooms.
Getting the ducts right before a heating replacement saves headaches later. It boosts comfort, shortens install time, and in many cases, allows you to downsize equipment because the distribution system actually works. This is the prep I advise when I’m asked to evaluate a home ahead of a heating unit installation, and it’s the process our crews follow in the field when we want a heating system installation to live up to the spec sheet.
Start with the big questions
Before tape measures and static pressure gauges come out, step back and look at the house as a system. The right prep grows from a few practical questions. How does the home feel today, not just on paper? Are there rooms that always lag? Do doors slam when the unit starts? Does dust collect around supply registers? These clues, simple as they sound, guide what to test and where to focus.
On a 1980s ranch I evaluated last winter, the owners complained about a cold den and a whistling hallway. The equipment was ten years old and tired, but the bigger issue was a starved return plenum and a supply trunk that necked down right before the den branch. We widened the return drop, added a dedicated return in the den, and rebuilt two takeoffs. Only after that did we swap the furnace. The whistling stopped, and the den finally matched the rest of the house within a degree or two.
Inspection you can’t skip
A flashlight and a notepad remain two of the most useful tools on a duct prep visit. You’re looking for problems that sabotage airflow and insulation that fails to do its job. Seventy percent of the fixes you’ll make announce themselves if you know where to stare.
Work methodically from the air handler outward. Check the return first, because a starved return plagues every downstream component. Thin, crushed flex on the return side is a red flag. Look for kinks, sharp bends, splices that have slipped, and any run that looks more like a garden hose than a duct. On sheet metal, rust around seams hints at past condensation or attic humidity. Any tape that curls back or looks brittle probably died years ago.
Follow the main supply trunk. Note transitions that narrow. If someone reduced a 14 by 8 trunk to 10 by 8 to snake past a joist, that restriction will haunt you later when a new blower tries to push its rated CFM. Ascertain whether branch runs hit each room as designed or if there were homeowner-initiated “improvements,” like a DIY tee added for a home office. Count and size supply registers and returns in each space, and jot down any rooms that only have one or the other.
In crawlspaces and attics, insulation tells its own story. Ducts with patchy wrap, exposed metal, or wet insulation lose heat fast. I’ve measured 15 degree drops across an uninsulated run on a 30-degree night. That’s energy dumped where nobody lives.
Finally, examine the air handler connections. The plenum-to-coil joint and the return drop are notorious for gaps. If you see daylight or feel air movement when the blower runs, put a big mental circle around those spots. Gaps at the equipment often dominate leakage totals.
Measure, don’t guess
Visual inspection points you toward problems. Measurements give you the scale. If there is one place that separates a professional prep from a band-aid, it’s in the data you collect before the heating replacement. You’re verifying that the ducts can handle the airflow your new equipment needs, not the flow the old unit limped along with.
Total external static pressure comes first. Most modern furnaces and air handlers want to see around 0.5 inches of water column total external static or lower, sometimes 0.8 for certain models, but check the nameplate and blower table. The majority of systems I test in existing homes run between 0.7 and 1.2. That means the blower is fighting the ductwork. You won’t know until you put a manometer across the return and supply and log the readings. Pay attention to the split. If return static is very high and supply reasonable, the return is the choke point. Reverse that and you have supply restrictions.
Next, pull out the ductulator or software and do a quick sanity check on duct sizing. You don’t need to redraw the house, but verify that the main trunks carry the right volume. As a rule of thumb, a three-ton system wants roughly 1,200 CFM. A 10-inch round carries around 300 to 400 CFM at typical residential velocities. If you see a three-ton system feeding off a single 10-inch round, you’ve found a bottleneck. For rectangular, a 14 by 8 at 0.08 to 0.10 friction rate handles roughly 700 to 900 CFM. Always validate against friction rate and the length of the longest run to the most remote register, not just rough tables.
Then test leakage. A duct leakage test with a calibrated fan and pressure gauge gives you CFM25, leakage at 25 Pascals. Many jurisdictions ask for less than 10 percent of system airflow. In a replacement, I like to target lower than 8 percent if the ducts are accessible, because resealing is cheap compared to equipment, and comfort returns are immediate. If you don’t have a tester, a smoke pencil and your hand can still find big leaks at transitions and seams, but budget for a proper test if your project is large or you plan to use a high efficiency, variable speed blower. Leaky ducts and high turndown equipment can create pressure and balance issues that are hard to diagnose after the fact.
Temperature and pressure at best heating system installation registers tell you whether a room is receiving the flow it needs. An anemometer is handy, but even a pro pocket thermometer will show big drops along uninsulated runs or starved branches. If a room is always cold, see if its branch is 5 degrees cooler than other branches at the same run time, or if the register is undersized. The goal is to assemble a map of problems that informs what you correct before the new unit lands.
Sizing matters more than brand
You can put an efficient furnace on bad ducts and it will underperform. You can also downsize a bit, within reason, after you fix ducts and air seal the house, and see better comfort. This is where loads and duct capacity collide.
Run a Manual J or a reasonable load calculation. Hand-waving leads to oversized heating capacity and short cycles. On a tight 1,800 square foot house with decent insulation, the design heat load may be 30,000 to 45,000 BTUs. Many homes carry 80,000 BTU furnaces left over from a past era. If you combine a right-sized unit with corrected ductwork, you reduce noise and drafts while smoothing out temperatures.
Tie that back to the ducts. Compute the total airflow the new furnace requires. A 60,000 BTU 95 percent furnace typically moves 1,000 to 1,200 CFM. Now ask if the return filter rack, the return drop, and the supply trunk can carry that without pushing static to the moon. Filter racks are frequently the quiet killers. A single 16 by 25 filter at 1-inch thickness may be too restrictive for a high-static, high-flow setup. A two-inch or four-inch media filter, or a second return, can cut pressure drop dramatically. I’ve seen a static drop from 0.35 to 0.12 inches of water simply by going from a single 1-inch MERV 11 filter to a 4-inch MERV 11 cabinet with better face area.
Manual D, or at least a pragmatic application of its principles, helps you resize or correct key runs before the heating unit installation day. Focus on main trunks, returns, and problem branches. You don’t have to rebuild an entire duct system to get good results. A few surgical fixes often unlock the airflow you need.
Sealing that lasts
Once you know where the air is escaping, you need to choose materials that survive heat, dust, and time. This is where many projects stumble. Ordinary cloth duct tape dries out and fails. Mastic with embedded fiberglass mesh on seams and UL 181-rated foil tape on clean metal hold up. For flex duct connections, the right sequence matters: inner liner seated fully over the collar, plastic tie or clamp tightened, mastic brushed around the joint, insulation sleeve pulled back, then foil tape or a second tie to close the outer jacket.
Take an afternoon to clean and prepare surfaces. Foil tape sticks to clean, oil-free metal. Use a rag and a bit of solvent if needed. Mastic needs to be thick enough to bridge gaps; think peanut butter, not paint. On big seams, bed in fabric and add a second coat. It is messy but dependable.
Pay special attention to the equipment-to-duct joints. Those are high-velocity areas that tend to whistle if there is a hairline crack. Seal the return plenum to the furnace cabinet and the coil box to the supply plenum thoroughly. If your system uses a downflow furnace with a platform, check the platform for leakage to the crawlspace or basement. A leaky return plenum can pull in dust, insulation fibers, and musty air, which ends up in the living room.
After sealing, re-test. This step is often skipped and it undermines the payoff. Going from a 20 percent leakage rate to under 8 percent is common on accessible duct systems. The new test result also gives you a baseline for the future.
Insulation that fits the climate
Uninsulated or underinsulated ducts in attics and crawlspaces drain heat. The solution isn’t merely to wrap everything thicker; it’s to ensure the insulation is continuous and dry, and that there are no thermal bridges.
In cold regions, R-8 on supply ducts in unconditioned spaces is a good target. Returns benefit too, not just supplies, since they can condense moisture if they run cold in humid attics. In milder climates, R-6 may suffice, but I still lean R-8 in attics, because the labor is similar and the energy savings accumulate over years.
Wrap tight around fittings and transitions. Gaps at elbows and takeoffs are common. Tape seams with UL 181 tape, not general-purpose tape, and support heavy sections so the insulation doesn’t sag and create air pockets. On flex duct, avoid compressing the insulation when strapping it; compression reduces R-value and can deform the inner liner, choking airflow.
While you’re there, insulate the platform around a downflow unit and any exposed metal on plenums in unconditioned spaces. If you can, improve the attic floor insulation and air sealing around duct penetrations. It doesn’t take long to foam around a boot where it enters the ceiling and it stops dust and attic air from infiltrating the room.
Returns: the hidden foundation of comfort
If I could make one universal change in older homes, it would be to add more return capacity. Many houses have a single central return. That design can work on open plans, but it falters on closed-door bedrooms or long hallways. The new variable-speed blower you install will try to modulate and keep airflow steady, but it can’t overcome a starved return without raising static pressure.
Aim for at least one return per major zone, and in many cases, a return in each bedroom. If that is not feasible, undercut doors or add transfer grilles to relieve pressure when doors are closed. Undercuts need to be generous, often three-quarter inch to one inch, and they only work if flooring and thresholds allow a path back to the central return.
Size returns generously. A 12 by 12 grille may deliver only 100 to 150 CFM quietly. If your system needs 1,200 CFM, you cannot ask two small returns to do that without noise. Use larger filter cabinets with more face area and low-pressure-drop filters. If allergies push you toward higher MERV ratings, increase the filter size even more to keep the pressure in check.
Clean enough for new lungs
Replacing a heating system without cleaning the ducts can move old debris into a new blower and heat exchanger. Not every system needs professional duct cleaning, but some do, especially if there has been renovation dust, rodent activity, or visible mold on insulation. If you see matted dust at registers and flakes blowing out on start-up, plan a cleaning. Make sure the crew seals and protects the coil and uses negative-pressure machines with HEPA filtration. Duct cleaning is not a substitute for sealing. It is a one-time reset to remove debris that sealing will help prevent from reaccumulating.
At a minimum, vacuum supply and return plenums, replace or upgrade the filter rack, and wipe down accessible interior cabinet surfaces before commissioning the new unit. It’s a small step that protects a big investment.
Get the attic and crawlspace ready
Work conditions affect workmanship. If your ducts live in the attic, clear a path from the access hatch to the air handler and main trunks. Lay down temporary planks if the joists are deep and the decking sparse. Good footing leads to better sealing and fewer crushed flex ducts. Light the area well. In crawlspaces, address standing water, pests, and low-hanging drain lines that block the path. I’ve seen installers contort around obstacles and leave a seam half-sealed because they couldn’t reach it properly. A few hours of prep in these spaces pay back in the quality of the final system.
If the attic has knob-and-tube wiring or other hazards, bring in an electrician before anyone lays hands on ducts. The same goes for asbestos tape on old ducts. Disturbing it without proper abatement is a health risk and a legal one.
Coordinate with the equipment plan
Duct prep isn’t done in a vacuum. It needs to align with the heating replacement plan. If you’re shifting from a single-stage furnace to a modulating furnace or hybrid heat pump system, the blower characteristics change. Modulating equipment often runs longer at lower speeds. That can expose balance issues you never noticed with a bang-bang system that flooded the ducts with air.
Discuss with the installer whether they plan to use a communicating thermostat, what external static pressure target they expect, and how they will set the blower taps or programming. Confirm filter philosophy, especially if you are moving to media cabinets or electronic air cleaners. If you’re adding a fresh air ventilation tie-in, sort out where the duct will connect and how it affects return balance.
If the new equipment footprint differs, adjust the plenum design ahead of time. A taller coil box or horizontal air handler often calls for a redesigned plenum to avoid sharp turns that add pressure loss. Have the sheet metal fabricated before install day if possible. Scrambling with stock fittings at 4 p.m. leads to compromises.
Balancing rooms without gimmicks
Once ducts are sealed and sized appropriately, fine-tuning goes faster. Start by setting registers fully open, then use balancing dampers at the trunk or branch takeoffs, not the register vanes, to adjust room flows. Register vanes create noise and turbulence and are not accurate. A simple pitot tube or a rotating vane anemometer at the register lets you quantify. If a room needs more air and the branch is already wide open, verify that the register and boot aren’t the choke point. Sometimes a 4 by 10 register swapped for a 6 by 12 makes the difference.
Resist the urge to close off multiple registers to force air elsewhere. That practice raises static pressure system-wide and can shorten blower life. If you need a lot more air in a distant room, consider adding a parallel branch or increasing the trunk size feeding that end of the house. In a two-story home with one system, a seasonal tweak may still be necessary. Some homeowners accept a quarter-turn on a few dampers at the change of seasons when loads shift upstairs and downstairs.
Two short checklists the crew uses on site
- Verify filter area and media type match blower CFM. If pressure drop across the filter exceeds 0.15 inches of water at design flow, upsize or switch to deeper media. Confirm total external static pressure after sealing and before equipment change. If above the target, correct returns first, then supply restrictions. Seal equipment-to-duct connections with mastic or UL 181 foil tape, including coil box seams and platform gaps. Insulate all exposed metal in unconditioned spaces to at least R-6, with R-8 preferred in cold climates. Balance using dampers at trunks or branches, not at the registers, and document damper positions for the homeowner. Test duct leakage at 25 Pascals and record CFM25 and percent of design airflow. Aim under 8 percent where accessible. Measure supply air temperature rise across the heat exchanger and verify it stays within the manufacturer’s rated range after airflow adjustments. Check return pathways from closed-door rooms. Add transfer grilles or undercuts if pressure exceeds about 3 Pascals with the door shut. Verify flex duct supports every 4 feet and long-radius bends with no kinks or compression. Label dampers, plenums, and filter sizes for easy maintenance and future service.
Mind the filter strategy
Filters are a deceptively complex part of duct prep. People want clean air and often reach for high MERV ratings. High MERV filters at small face areas strangle airflow. The compromise is to increase face area and select quality filters with consistent pressure drop. A 4-inch media cabinet is a workhorse solution. It keeps pressure moderate and extends service intervals to three to six months, sometimes longer in clean homes.
Position filter racks on the return side where they are accessible. Filters tucked into dark closets behind furniture go unchanged. A hinged door with a clear label saves you later phone calls. If the system will include a bypass humidifier, keep the filter upstream of that tie-in and seal any penetrations around the humidifier collar. Water and dust are not friends.
When to rebuild versus repair
Not every duct system deserves salvation. If the ducts are asbestos-lined or crushed beyond recognition, a rebuild is safer and often cheaper than trying to patch a thousand cuts. In homes with major layout changes, like garage conversions or additions, a clean redesign can correct years of ad-hoc branches. Rebuilds also shine when you switch fuels or system types. Going from a furnace to a heat pump with higher airflow at lower temperature rise might justify larger trunks and more return area.
On the other hand, I’ve delivered big wins with modest work: upsizing a return drop, adding a second return, replacing a few kinks of flex with rigid metal and long-radius elbows, and resealing the plenums. If your total static drops into the manufacturer’s happy zone and room-to-room temperatures tighten, you’ve prepped well.
What to expect cost-wise
Budgets vary widely by region and house size, but some ranges help planning. Sealing and minor repairs on an accessible system might run a few hundred to a couple thousand dollars. Adding returns and upgrading filter cabinets typically falls in the 500 to 2,000 range, depending on finishes and wall work. Reinsulating ducts in an attic or crawlspace can be similar. A partial rebuild of main trunks and key branches often lands between 2,000 and 5,000. Full duct replacement can exceed that, especially in finished spaces that require drywall work.
The payback is not only utility savings. Lower static reduces blower strain, which reduces noise and increases equipment life. Comfort is the dividend homeowners feel every day. When you factor those in, duct prep becomes part of the heating replacement, not an optional add-on.
Commissioning ties it all together
After the new equipment is set, the real measure of duct prep shows up in commissioning. This is where your earlier tests pay dividends. Recheck total external static, supply and return splits, and room temperatures after a few days of operation. Verify the temperature rise across the heat exchanger sits within the manufacturer’s band. If it’s high, increase airflow or hunt for late-stage restrictions. If it’s low, you might be moving too much air, or your ducts are picking up too much heat loss in a cold attic.
Listen as much as you measure. Whistles usually mean small gaps at high velocity changes, often at the coil outlet. Rumbles point to undersized returns. Register hiss often traces back to tight boots or high face velocity. Tweak dampers lightly and give the system time to settle. I like to follow up a week later, when the house has run through a few heating cycles, to make final adjustments.
A few edge cases worth noting
Older homes with gravity furnaces often have oversized, low-velocity ducts that seem generous but include leaky chases and odd transitions. They can work beautifully after sealing and modest resizing, but watch out for asbestos. Homes with finished basements may hide long runs behind drywall; intrusive work isn’t always worth it. In those cases, consider zone dampers or a secondary unit for distant areas rather than forcing more air through a constricted path.
All-electric homes switching to cold-climate heat pumps need particular care. Heat pumps move more air with a lower temperature rise than gas furnaces. That means larger ducts or at least carefully managed static to maintain efficiency and prevent defrost-related comfort swings. Don’t bolt a high-capacity air handler onto a legacy duct system and expect quiet, even heat. Give the ducts the same attention you’d give the outdoor unit selection.
The payoff
Good duct prep is not glamorous, but it is the reason a heating system installation feels right. The room that used to lag by four degrees now sits within one. The blower ramps quietly and moves the right amount of air without straining. Dust levels drop. Filters last longer. Most of all, the new equipment hits the performance numbers the brochure promised because the ducts allow it.
If you’re planning a heating replacement, budget time and money for the ductwork. Ask for measurements, not just opinions. Expect a few fixes and embrace them, because they are the foundation. The new unit is the heart of the system, but the ducts are the arteries. Prep them well and the whole house benefits.
Mastertech Heating & Cooling Corp
Address: 139-27 Queens Blvd, Jamaica, NY 11435
Phone: (516) 203-7489
Website: https://mastertechserviceny.com/